If you’ve been eyeing a room makeover but dreading the mess, cost, and commitment of traditional wallpaper, easy weekend projects with peel-and-stick wallpaper are your answer. Removable wallpaper delivers instant style without the permanence — no paste, no professional installer, no problem. Whether you’re a renter who can’t touch the walls or a DIY beginner looking for a confidence-boosting first project, this material has quietly revolutionized interior decorating.
Why Peel-and-Stick Wallpaper Is Perfect for Weekend DIY Projects
Removable wallpaper has surged in popularity because it meets modern decorating demands head-on: it’s affordable, forgiving, and fast. A single accent wall can be completed in an afternoon, and if you change your mind next season, removal is just as straightforward as installation.
Benefits of Peel-and-Stick Wallpaper vs. Traditional Wallpaper
| Feature | Peel-and-Stick | Traditional Wallpaper |
|---|---|---|
| Installation time | 2–4 hours | Full day or more |
| Tools required | Minimal | Paste, brushes, seam roller |
| Skill level | Beginner-friendly | Intermediate to advanced |
| Removal | Clean, damage-free | Often damages walls |
| Cost (per roll) | $20–$60 | $30–$100+ plus adhesive |
| Repositionable | Yes | No |
Ideal Spaces to Use Removable Wallpaper
Peel-and-stick wallpaper thrives in spaces where flexibility matters most:
- Rental apartments and leased homes
- Children’s bedrooms and nurseries (tastes change fast)
- Bathroom feature walls
- Home office accent walls
- Studio apartments where one bold wall defines the space
- Dining rooms and entryways that benefit from a dramatic focal point
Choosing the Right Peel-and-Stick Wallpaper for Your Space
The market offers hundreds of patterns, textures, and colorways — which is exciting but can quickly become overwhelming. Narrowing your selection by room function, existing décor, and natural light will save you hours of indecision and returns.
Popular Wallpaper Styles and Design Trends
Current interior design trends favor:
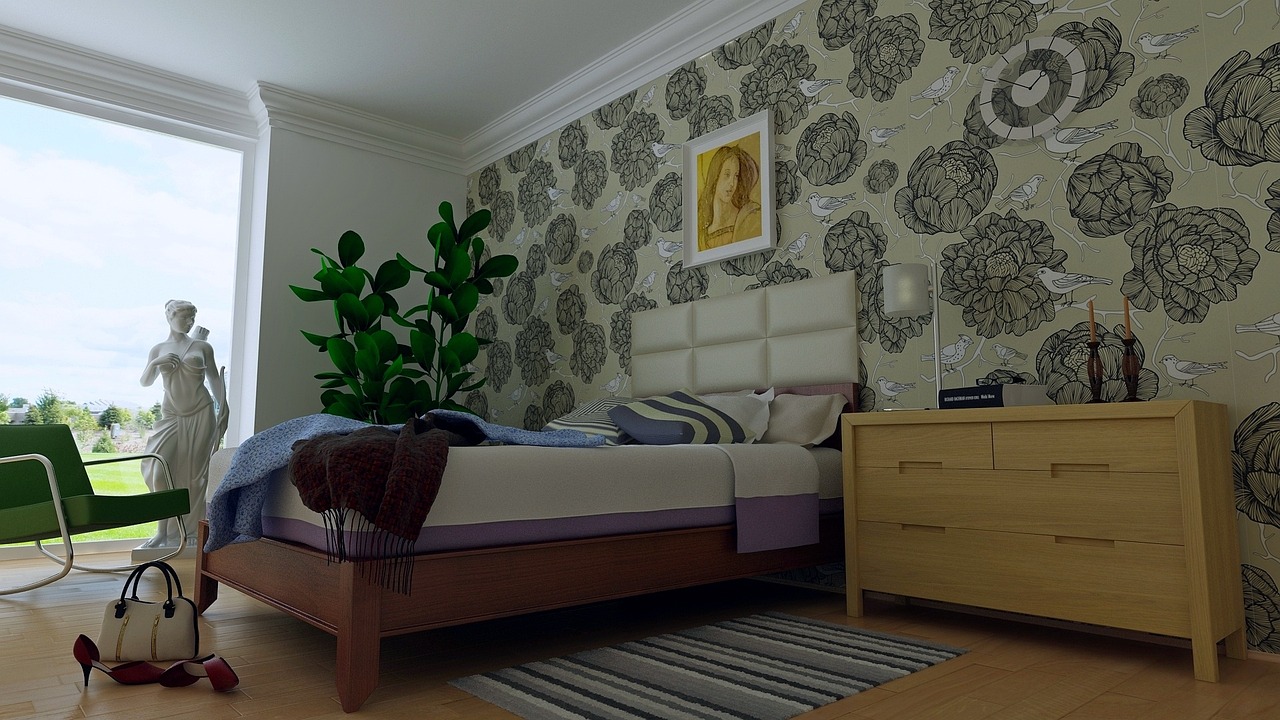
- Botanical and floral prints — lush, maximalist, or delicate Scandi-style
- Geometric patterns — hexagons, chevrons, and abstract shapes for modern spaces
- Faux textures — linen, brick, wood grain, and concrete effects
- Minimalist line art — subtle, airy designs for Japandi and Scandinavian aesthetics
- Vintage and retro motifs — arches, terrazzo, and 70s color palettes
How to Match Wallpaper with Room Size and Lighting
| Room Type | Best Pattern Scale | Ideal Colors |
|---|---|---|
| Small room | Small-scale or vertical print | Light, cool, or neutral tones |
| Large room | Large-scale, bold repeat | Deep jewel tones or saturated hues |
| Low-light room | Reflective or light-colored prints | Cream, white, soft yellow |
| Bright, sunny room | Any scale works | Pastels or bold colors both succeed |
Material Quality and Adhesion Considerations
Before buying, evaluate these quality markers:
- ✅ Vinyl-coated — most durable, moisture-resistant, great for bathrooms
- ✅ Fabric-based — repositionable more times, softer look, ideal for textured walls
- ✅ Paper-based — lightest option, best for smooth walls only
- ✅ Adhesive should be pressure-sensitive, not permanent
- ✅ Look for “damage-free” or “renter-safe” labeling
Tools and Materials You Need for a Smooth Installation
Going in prepared is half the battle. Gathering your tools before you begin prevents mid-project scrambles and keeps momentum going from the first strip to the last.
Essential Tools Checklist
- Measuring tape and pencil
- Level or laser level
- Smoothing tool or credit card
- Utility knife or sharp scissors
- Step stool or ladder
- Painter’s tape (for marking guidelines)
- Microfiber cloth for wall cleaning
Preparing Your Walls for Best Results
- Clean the surface thoroughly with a mild detergent and let it dry completely — at least 24 hours.
- Fill any holes or cracks with spackle; sand smooth once dry.
- Wipe away dust with a lint-free microfiber cloth.
- Check for grease near kitchens — degrease with rubbing alcohol if needed.
- Let freshly painted walls cure for a minimum of 30 days before applying any peel-and-stick product.
Step-by-Step Guide to Installing Peel-and-Stick Wallpaper
A methodical approach makes the difference between a professional-looking result and a frustrating afternoon. Work slowly, check alignment constantly, and never rush the peel. According to Architectural Digest’s wallpaper installation guide, starting from a plumb vertical line is the single most important step beginners skip.
Measuring and Cutting Wallpaper Panels
- Measure wall height from floor to ceiling (add 2–3 inches extra per panel).
- Measure wall width to calculate how many strips you need.
- Lay panels on a flat surface, pattern-side down.
- Mark your cut line with a pencil and ruler.
- Cut cleanly with a sharp utility knife in one smooth motion.
Applying Wallpaper Without Bubbles or Wrinkles
- ✅ Start at the top of the wall and work downward
- ✅ Peel back only 6–8 inches of backing at a time
- ✅ Press with a smoothing tool from the center outward
- ✅ Use the “book folding” method — fold the backing down in sections rather than pulling it off entirely
- ✅ Reposition immediately if you spot a bubble — the adhesive allows it early on
Aligning Patterns and Seams Perfectly
- Butt seams tightly — do not overlap panels
- Match pattern repeats at eye level first, then adjust top and bottom
- Use a plumb line or level to re-check vertical alignment every 2–3 strips
- Trim excess at baseboards and ceiling with a utility knife against a straight edge
Creative Peel-and-Stick Wallpaper Ideas for Every Room
Think beyond the full feature wall. Peel-and-stick opens up unconventional decorating possibilities that traditional wallpaper simply can’t match.
Accent Walls That Make a Statement
- Bedroom headboard wall in a moody botanical or deep geometric
- Fireplace surround with a tile-effect pattern
- Behind open shelving in a kitchen or living room
- Entryway wall with a dramatic large-scale mural print
Upgrading Furniture and Small Surfaces
- Line the inside of bookshelves and cabinets
- Resurface dresser drawer fronts
- Wrap the back panel of a display cabinet
- Refresh a side table or desk surface
- Update stair risers with a repeating geometric
Unique Spaces: Ceilings, Stair Risers, and Nooks
- Reading nook walls — cozy, immersive, easy to change
- Ceiling medallion effect — apply a bold circular pattern above a bed
- Under-stair storage interiors — make a hidden space beautiful
- Window alcove walls — frame the view with color
Budget-Friendly Tips for a Stylish Wall Transformation
You don’t need to wallpaper an entire room to make an impact. Smart planning keeps costs low while delivering a designer-level finish.
How to Calculate Wallpaper Quantity Accurately
Formula: (Wall height + waste allowance) × number of strips needed ÷ roll length = rolls required
| Wall Size | Estimated Rolls Needed | Notes |
|---|---|---|
| Small accent wall (8×8 ft) | 2–3 rolls | Add 10% for waste |
| Medium wall (10×10 ft) | 4–5 rolls | Add 15% for pattern matching |
| Large wall (12×12 ft) | 6–8 rolls | Add 20% for complex repeats |
Saving Money Without Compromising Style
- Buy one extra roll and return unopened rolls within the return window
- Mix two complementary patterns — use the bolder one only on one wall
- Cover only the upper half of a wall, separated by a chair rail or painter’s tape line
- Shop end-of-roll remnants online for small projects like drawer liners
- Use sample swatches before committing to a full purchase
Common Mistakes to Avoid When Using Peel-and-Stick Wallpaper
Even the easiest DIY project has pitfalls. Knowing them in advance means you can sidestep them entirely rather than fix problems mid-installation.
Skipping Wall Preparation
Poor surface prep is the number one reason peel-and-stick wallpaper fails prematurely:
- Dust and grease prevent adhesion — always clean first
- Textured or uneven walls cause bubbling — sand or skim-coat beforehand
- Fresh paint off-gasses — always wait the full cure time
Misaligned Patterns and Uneven Cuts
- ✅ Always use a plumb line before placing the first strip
- ✅ Double-check pattern alignment before pressing firmly
- ✅ Cut panels with a metal ruler and utility knife, not freehand scissors
- ✅ Mark panel numbers on the backing before cutting to avoid mix-ups
Rushing the Installation Process
- Allow 30 minutes per strip as a beginner — speed comes with practice
- Let cleaned walls dry overnight before applying
- Give adhesive 24–48 hours to fully bond before assessing results
- Don’t pull panels off quickly if repositioning — slow, steady peeling protects the wall
How to Remove or Replace Peel-and-Stick Wallpaper Easily
One of the most appealing qualities of removable wallpaper is the exit strategy. Knowing you can change your walls whenever you want makes bold design choices far less intimidating.
Safe Removal Without Damaging Walls
- Start at a corner or seam and peel back slowly at a 45-degree angle
- Apply gentle heat with a hairdryer to soften stubborn adhesive sections
- Pull parallel to the wall surface, not outward — this reduces tearing risk
- Remove any adhesive residue with a cloth dampened with warm soapy water or rubbing alcohol
- Allow the wall to dry before assessing for any minor touch-up painting
Reusing or Replacing Wallpaper Panels
- Panels can sometimes be reused if removed carefully and stored correctly
- Re-roll panels pattern-side in, backing-side out, and store flat
- Reuse works best on very smooth walls with minimal texture
- If adhesive has weakened, apply removable double-sided tape to the back
- Panels stored for more than 6 months may lose significant adhesion — test before reapplying
Quick Weekend Project Plan: From Start to Finish
Two days is genuinely all you need for a complete room transformation. Here’s how to structure your time for maximum efficiency.
Day 1: Planning and Preparation
- ☐ Measure your target wall(s) and note dimensions
- ☐ Calculate rolls needed using the formula above
- ☐ Choose and order (or purchase) your wallpaper
- ☐ Gather all tools and supplies
- ☐ Clean and prep walls thoroughly
- ☐ Allow walls to dry completely overnight
Day 2: Installation and Finishing Touches
- Mark your vertical plumb line with a level and pencil
- Cut all panels to length before starting application
- Apply first strip from ceiling down, smoothing as you go
- Continue strip by strip, aligning patterns carefully at each seam
- Trim excess at ceiling, baseboards, and outlets with a utility knife
- Step back and inspect for bubbles — press out any remaining ones
- Style the room — bring in furnishings, lighting, and accessories that complement the new look
Conclusion
Peel-and-stick wallpaper has genuinely democratized interior design. What once required a professional, a permit in some rental agreements, and days of disruption now takes a weekend, basic tools, and a good eye for pattern. The combination of design flexibility, beginner-friendly application, and damage-free removal makes it one of the smartest home improvement investments available today. Whether you’re refreshing a single accent wall or reimagining an entire room, the only thing stopping you is getting started — and with this guide, that part just got a lot easier.